Use a self-hosted GitLab as Identity Provider in Keycloak
You can connect an existing self-hosted GitLab installation to your Keycloak to allow users of said GitLab installation to authenticate against your Keycloak SSO. This could be interesting for you, if you e.g., want to grant an external development agency access to your Kubernetes which you authenticate against Keycloak via OIDC.
This setup guideline, however, is only about Keycloak and GitLab and therefore valid whether you’re using Kubernetes at the end or not.
GitLab
GitLab has a built-in OIDC server. To use it, you need to add a new Application in the admin area.
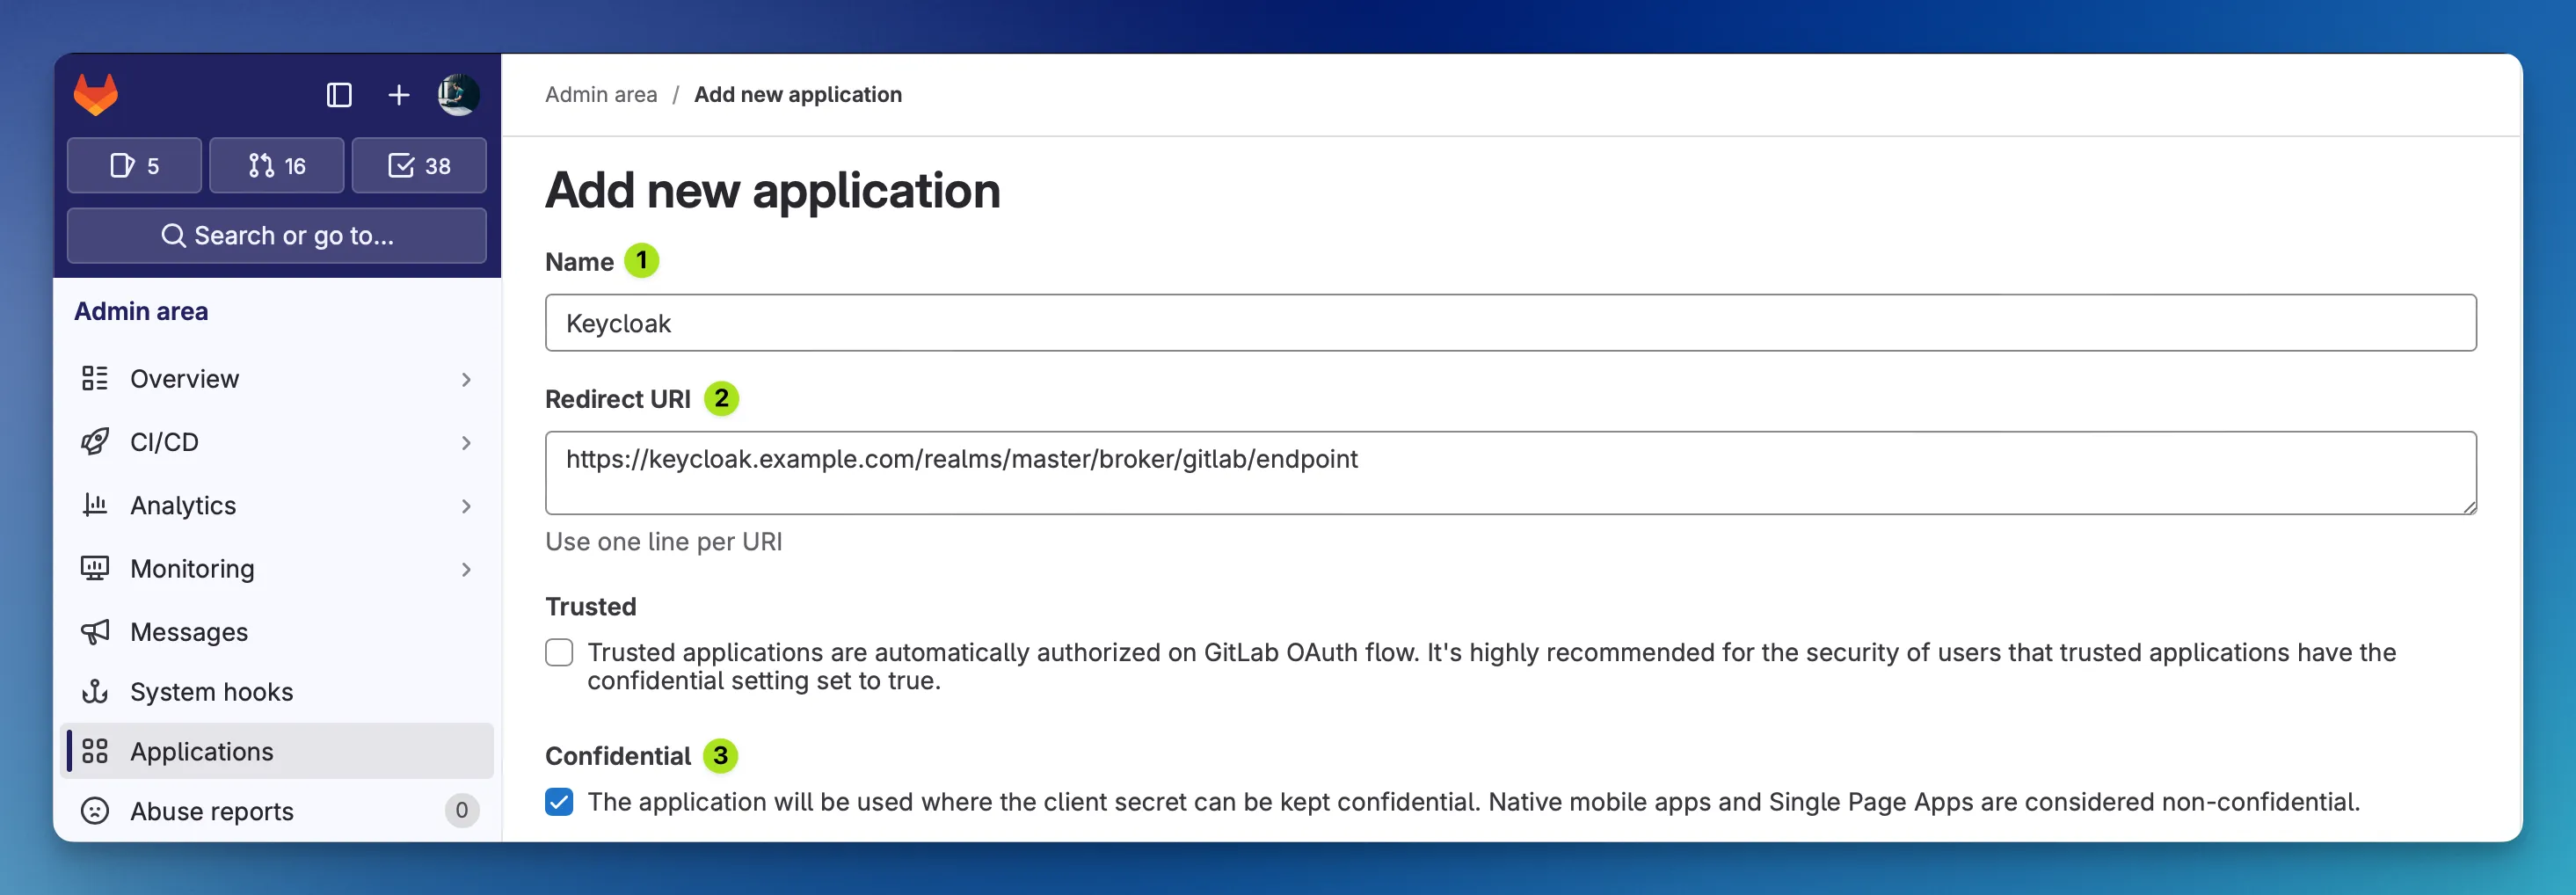
The Name is for display purposes only. Clients who authenticate against GitLab via Keycloak will see that name, so it would be good to choose a recognizable name so your GitLab users know where they sign in to.
The Redirect URI is built after a specific Keycloak schema. It contains the Alias of the identity broker which can be freely chosen in the second step where we configure Keycloak to use GitLab as broker:
https://keycloak.example.com/realms/master/broker/gitlab/endpointInstead of gitlab you can use another, more expressive name. Just keep in mind that we need that value later on in the second step.
Then, check the Confidential checkbox which indicates to GitLab that the OIDC Secret will not be exposed to the clients authenticating, which is the case here.

To finish the application creation in GitLab, choose the openid scope from the list of available scopes. Usually, you don’t need anything else. That also allows Keycloak to see things like the username and the group memberships. If you additionally want to retrieve the user’s email address, you can tick the box for email as well.
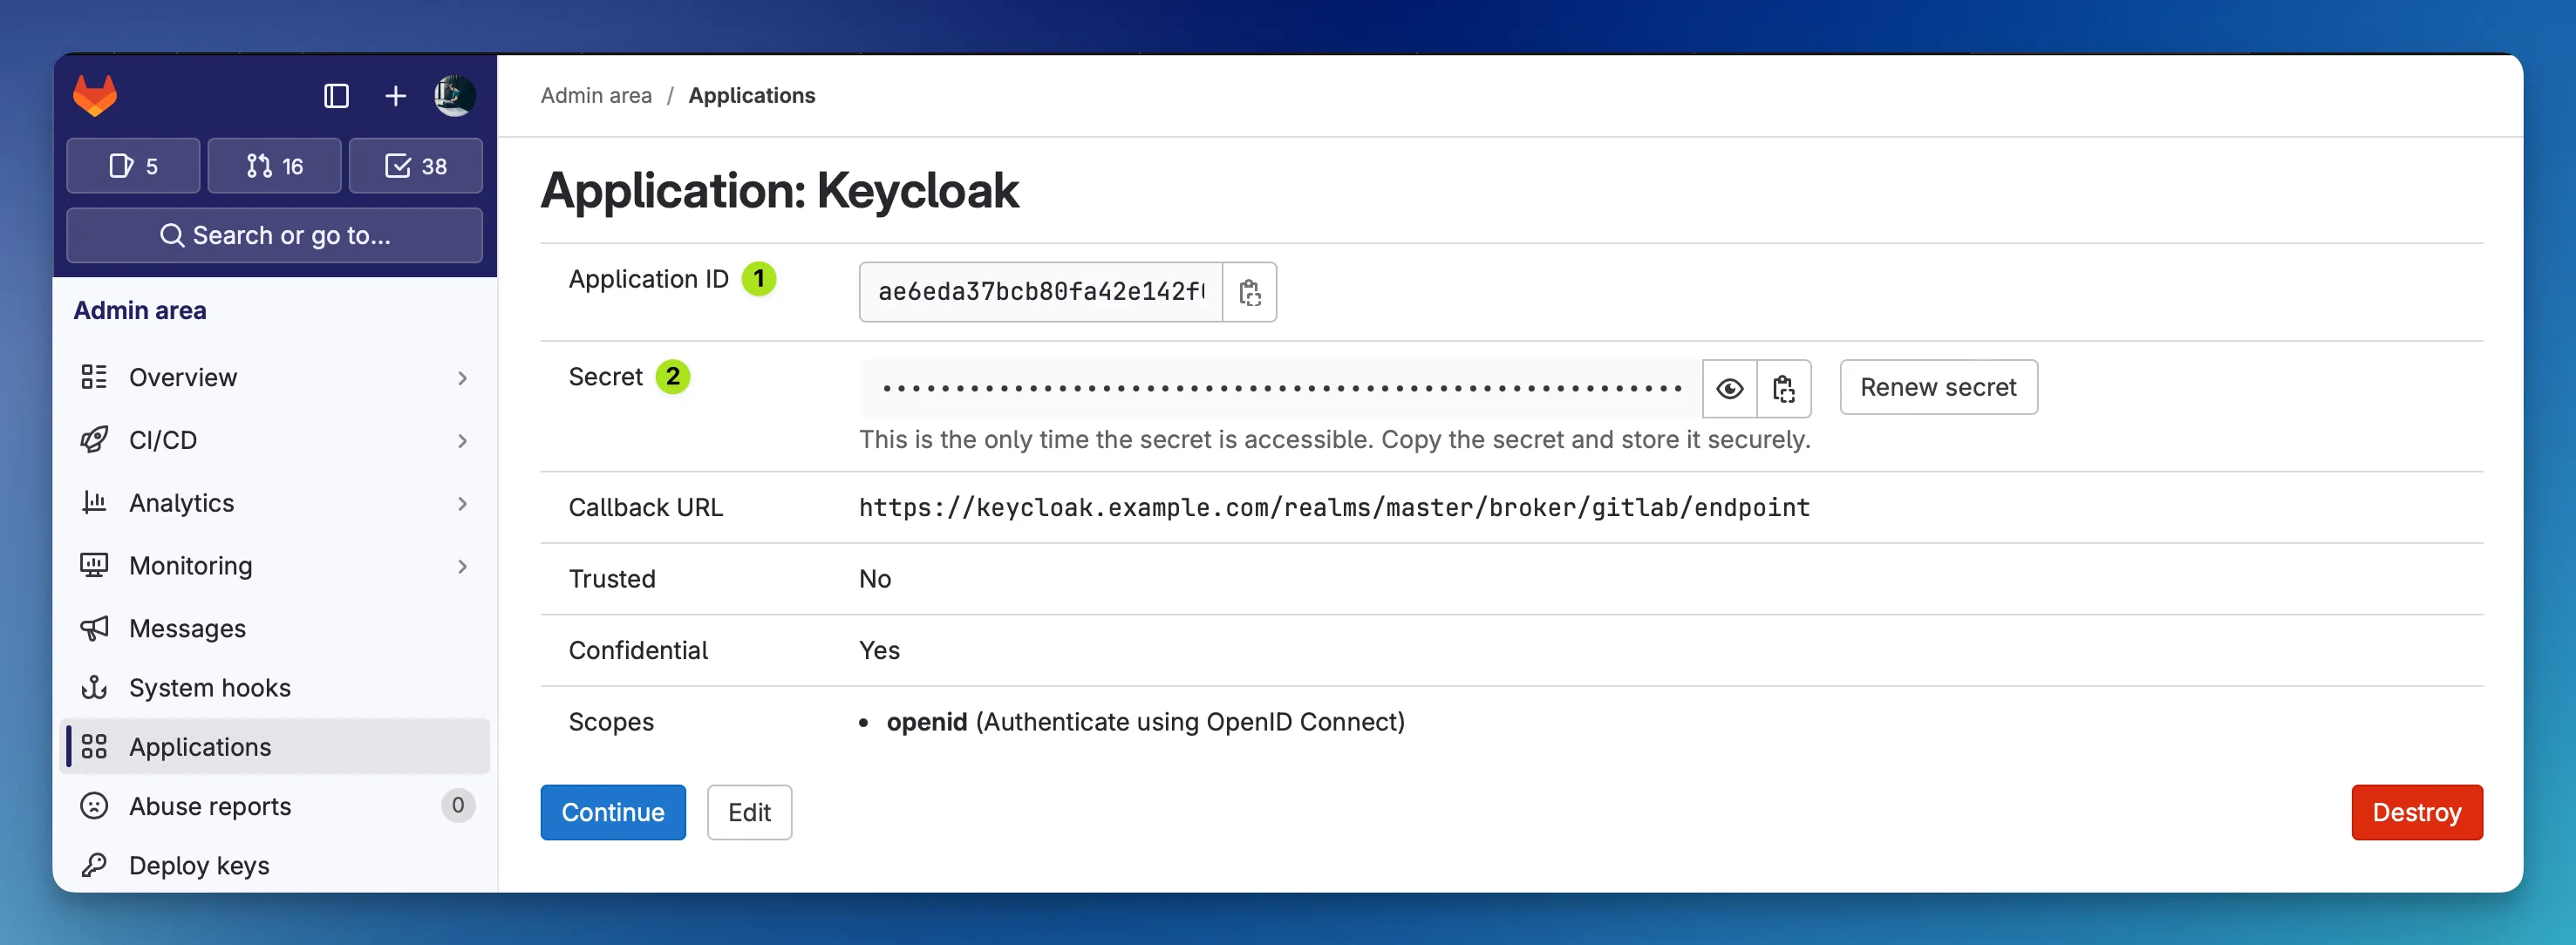
After creating the application, make sure that you store both, the Client ID and the Client Secret for further usage in the Keycloak configuration in the next step.
Keycloak
Now that GitLab has been set up, we can configure Keycloak to use GitLab as identity provider (or identity broker, if you want to call it like that).
Go to the Keycloak Admin Console and find the Identity providers navigation item on the left bottom. Then choose OpenID Connect 1.0 as provider type and create a new one.
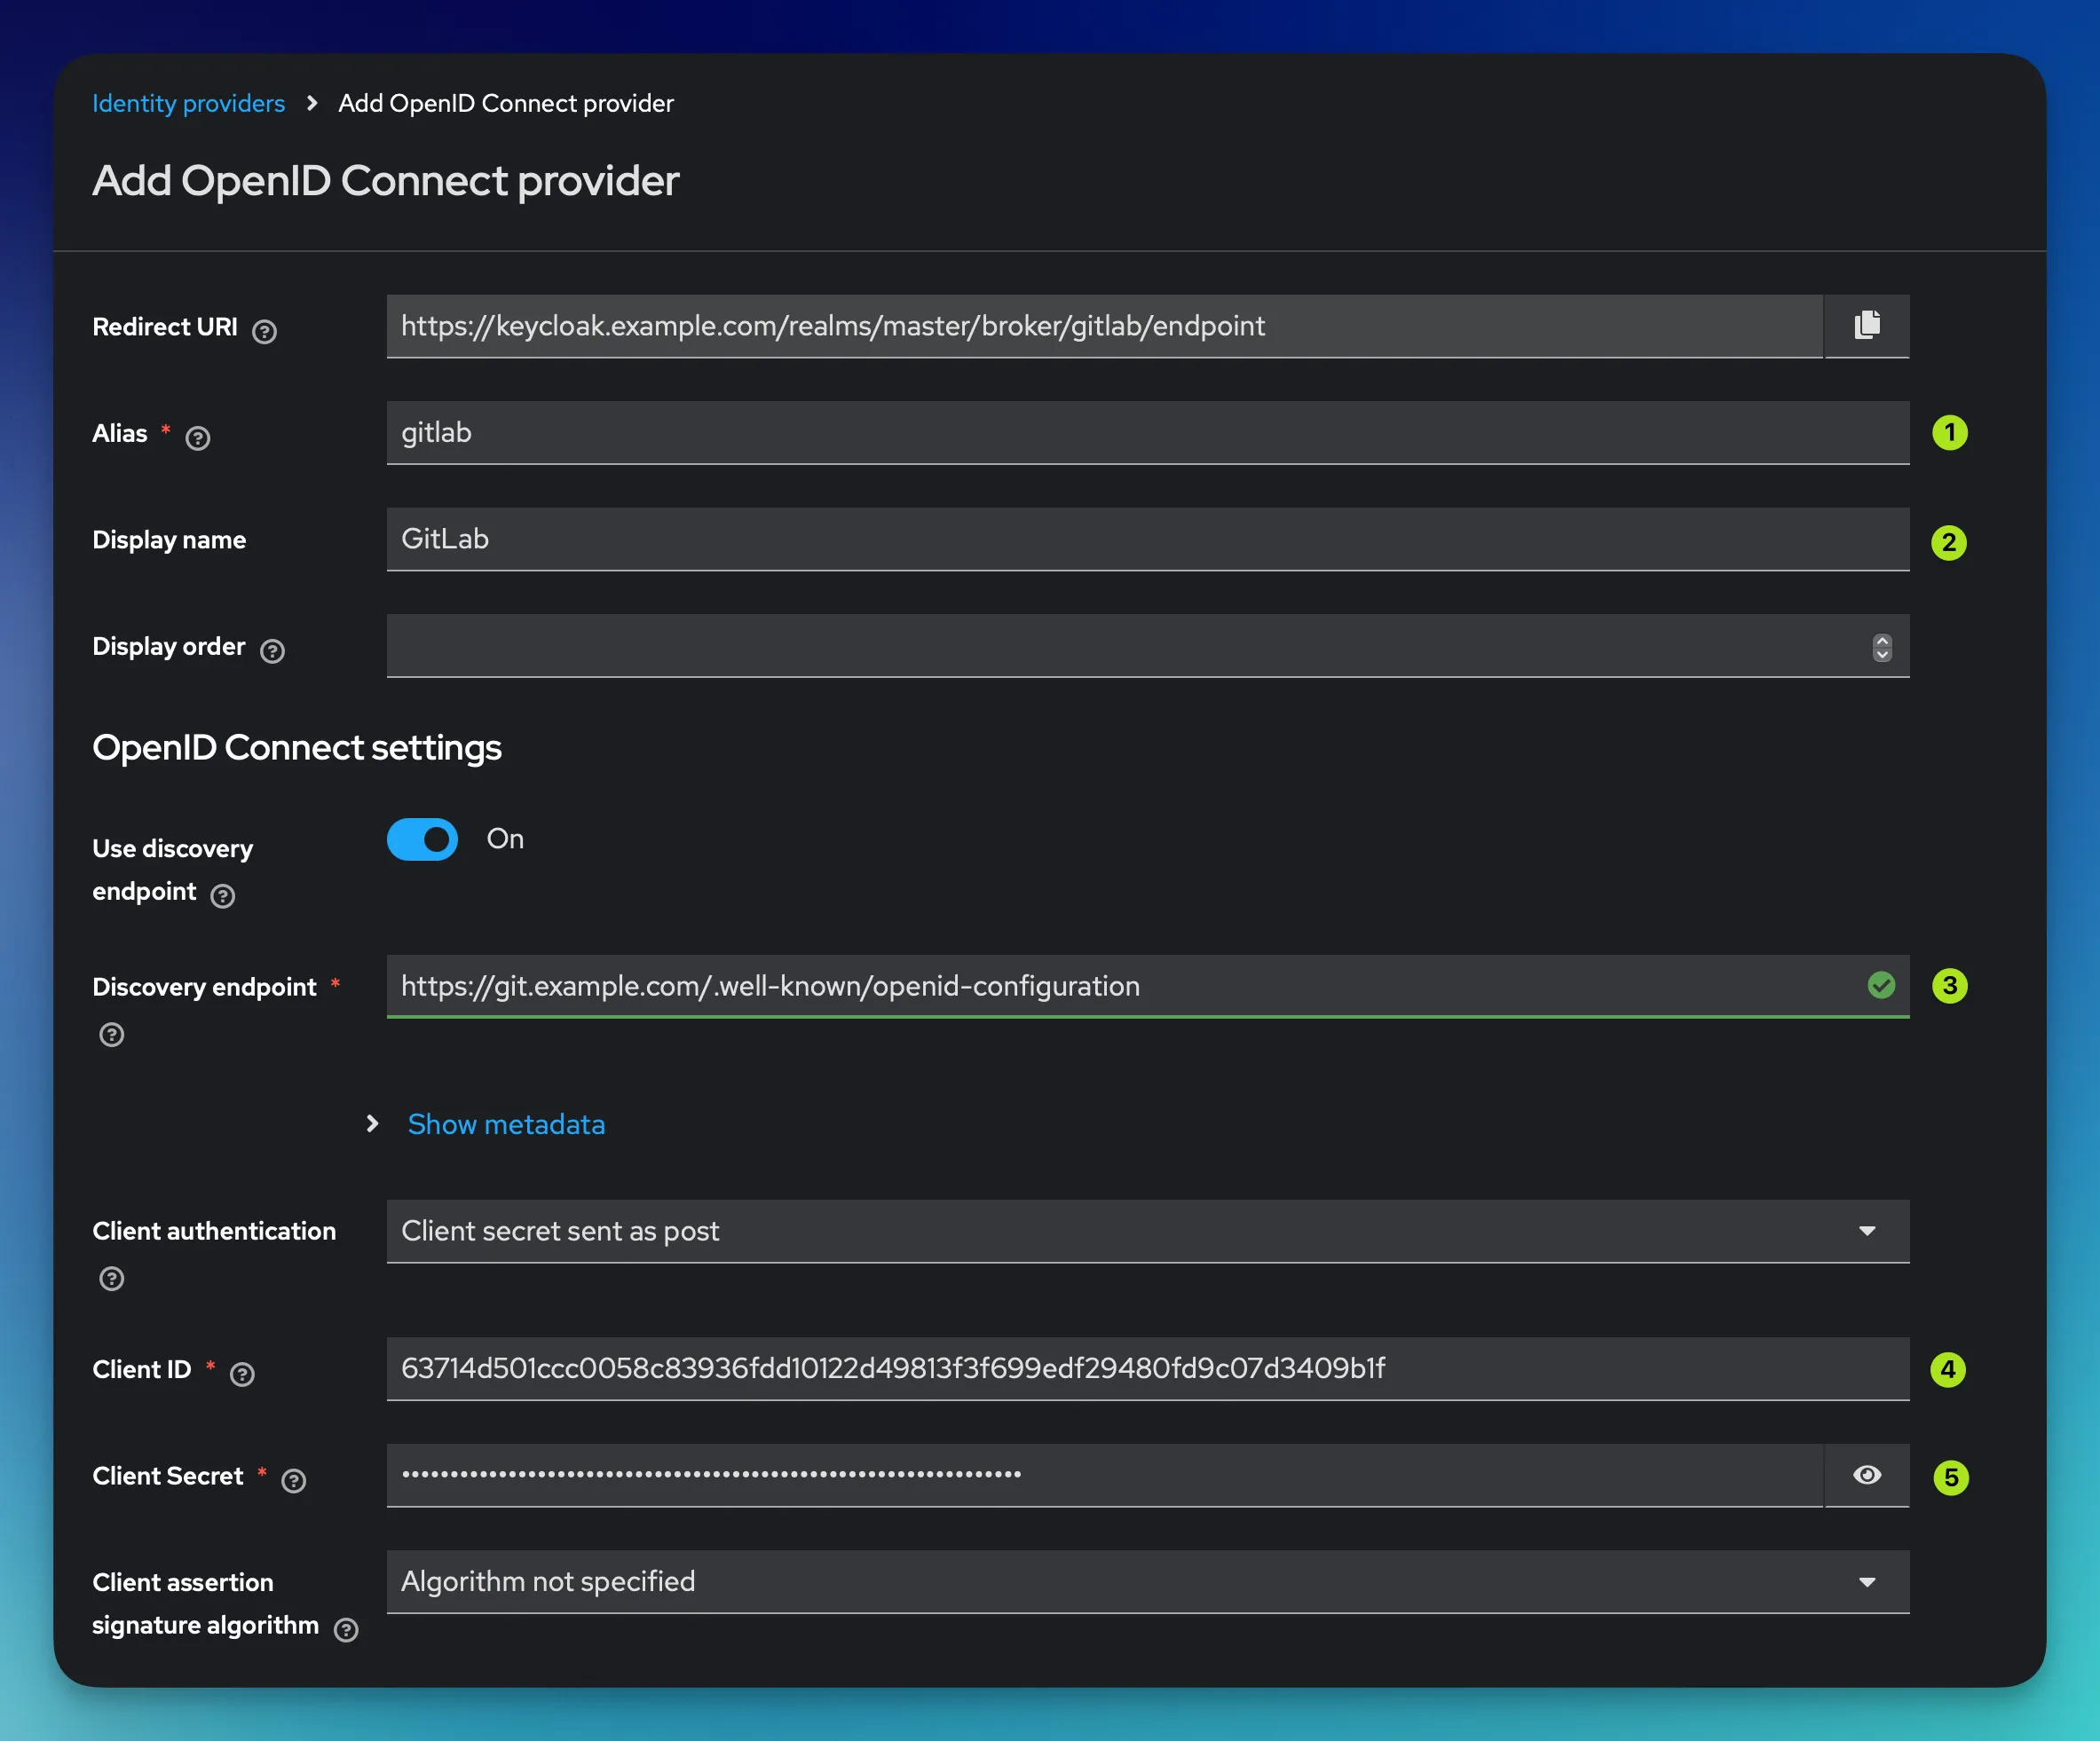
First field to fill out is the Alias field. You need to use the same one you specified when configuring the Redirect URI in GitLab. In my example above, I simply used gitlab. This then should generate the same Redirect URI you provided when creating the GitLab OIDC application in the first step.
The second field is the Display Name of the identity provider. If publicly displayed, the name of your identity broker will be visible on the Keycloak login page.
Third field in the wizard is the Discovery Endpoint. OIDC is quite complex, luckily there’s a well-known OpenID specification format Keycloak can use to learn everything it needs to know about the GitLab-specific OIDC settings. The only thing you need to do is provide Keycloak with said discovery endpoint.
In GitLab this discovery endpoint lives under the following static URL:
https://git.example.com/.well-known/openid-configurationJust make sure that you replace git.example.com with the hostname of your own GitLab installation.
The fourth and fifth field are the Client ID and Client Secret you copied after creating the GitLab OIDC application in the last step.
Mappers
Right now, the login via GitLab should already work. However, there are two main problems we should address:
- The Keycloak user that is being created upon login has the same username as the GitLab user which might be undesireable.
- Keycloak (or to be more specific the consuming applications that authorize via Keycloak) now know(s) who the user is, but not what the user is actually authorized for.
Both issues can be solved using so-called Mappers in Keycloak. The job of these mappers is to map third party attributes (coming from GitLab in our case) to Keycloak-specific ones.
Username Mapper
First thing we’ll take care of is a username mapper. In this example, we simply want to prefix all usernames coming from GitLab with gitlab- so we can see at a glance which user is coming from our third party identitiy provider and which one is Keycloak-native.
On the Identity Provider’s detail page, open the Mapper tab and click Add Mapper.
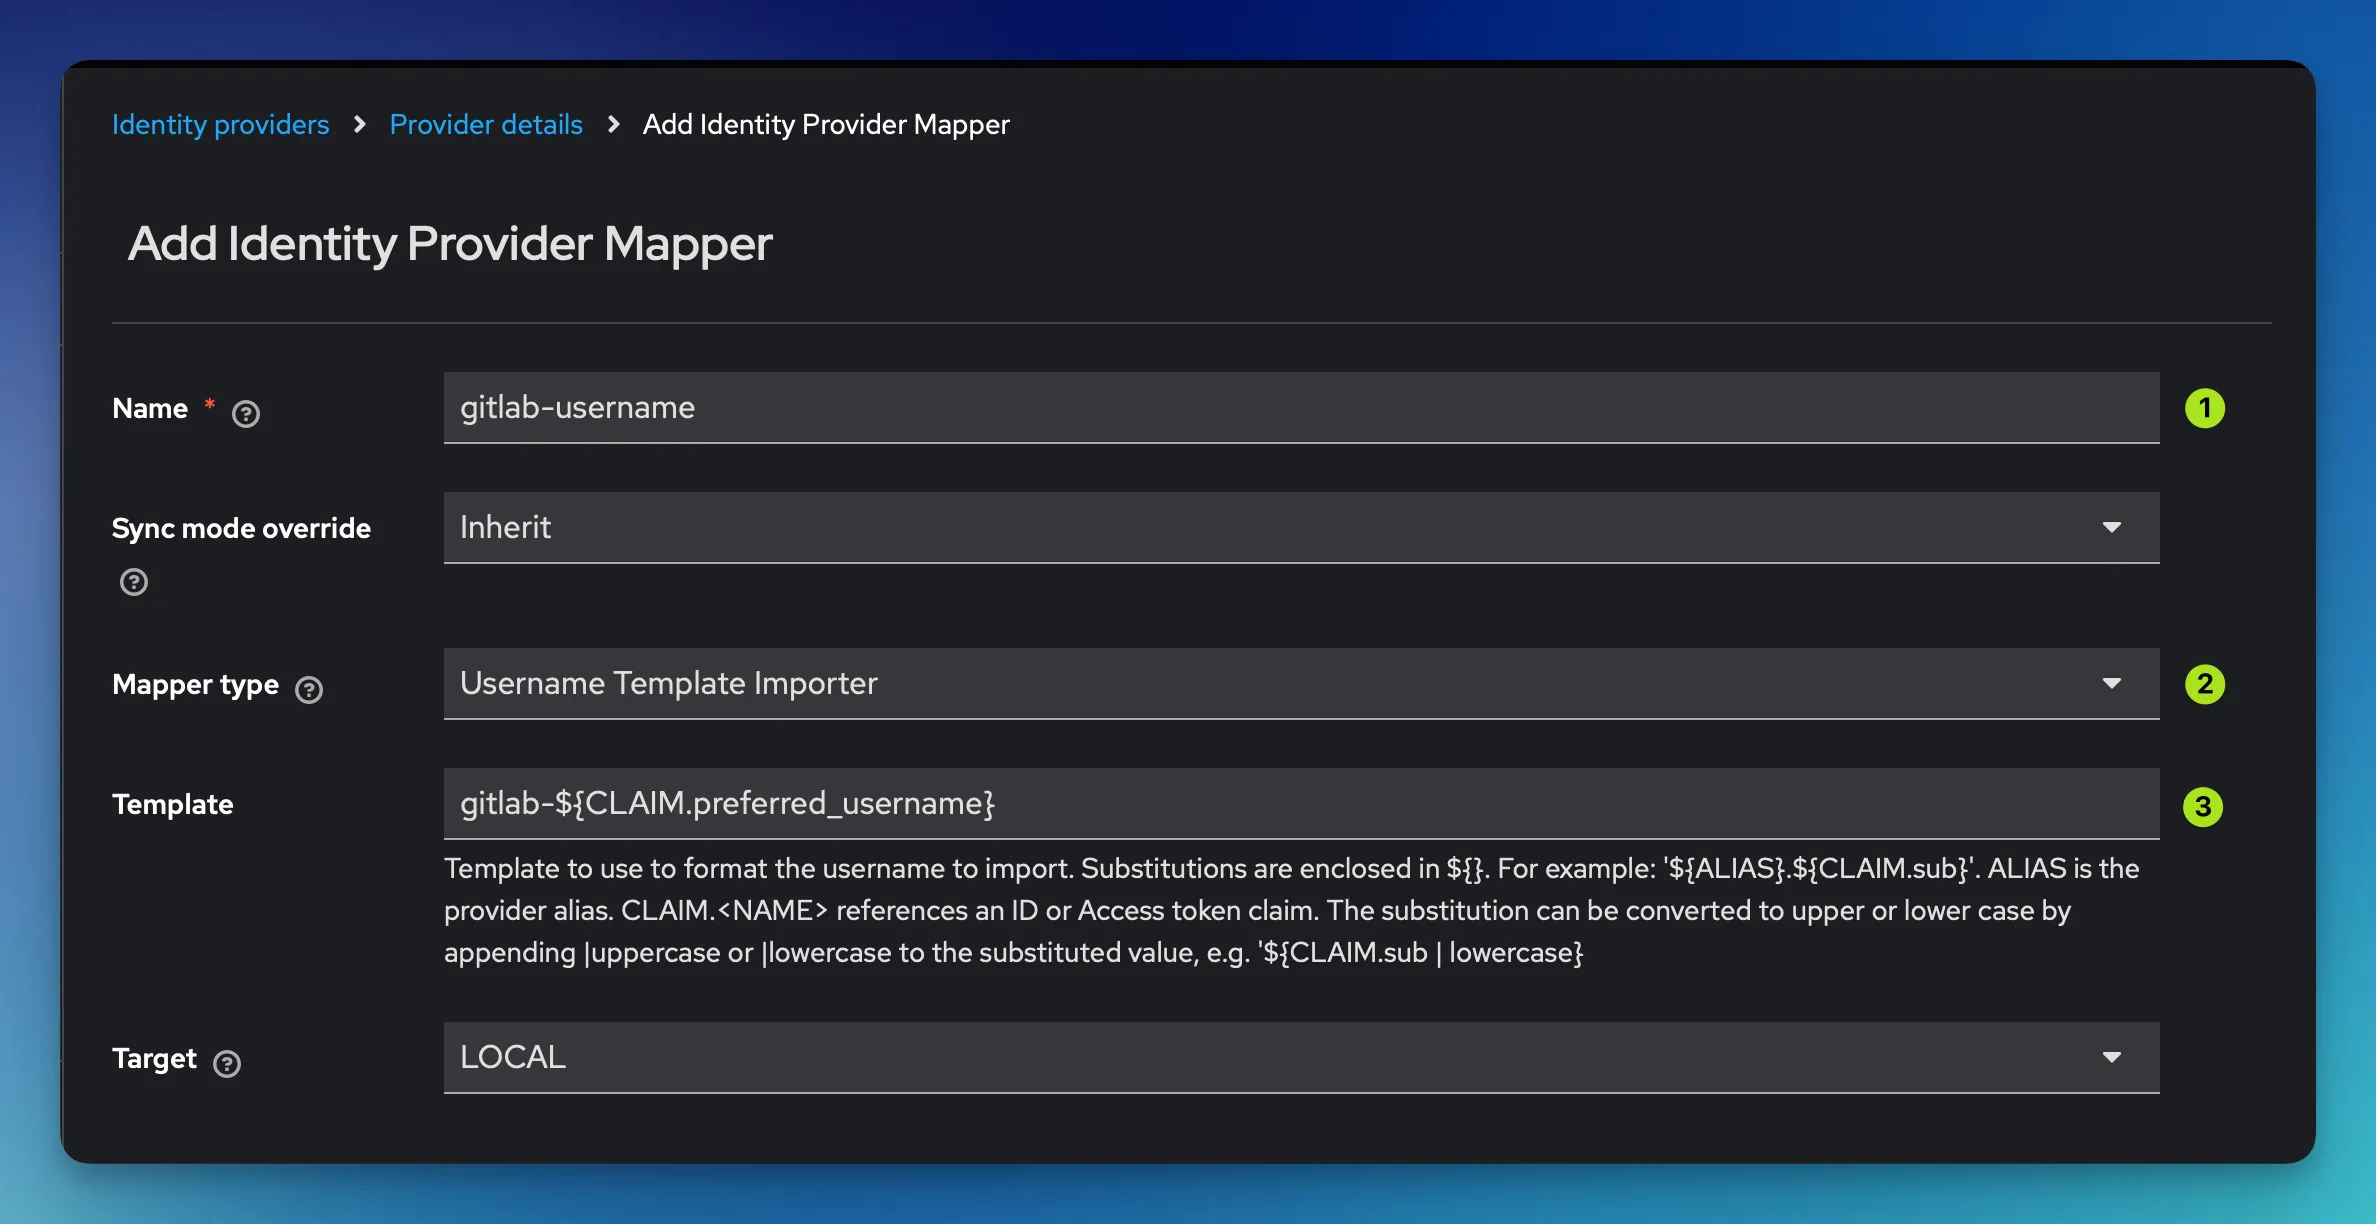
While the Name field is just for display purposes, the interesting part follows right below in field 2 and 3. As Mapper Type you need to configure a Username Template Importer. In the Template field below you can then configure the template Keycloak is using to derive the Keycloak username from the claims it receives from GitLab.
gitlab-${CLAIM.preferred_username}The highlighted part gets automatically subsituted by the preferred_username field that is present in the JWT Keycloak receives from GitLab during the first authentication. You could theoretically use any kind of field(s) present in the claim to derive the user’s username from them.
Group Mapper
The second important thing is group membership. I assume that you use Keycloak to e.g. grant users access to a Kubernetes cluster (or any other application you can think of). In those applicaiton you usually configure that a user of a certain group has certain rights. Right now, the authenticated user doesn’t belong to any group whatsoever.
The first thing you can do is a Hardcoded Group Mapping. This is potentially dangerous, because it just adds any authenticated user to a Keycloak group. This means that even an intern with a temporary GitLab account will be granted membership to a certain group in Keycloak. Sometimes, you may want this but in larger setups I highly recommend against this as it introduces a potential privilege escalation.
To configure that kind of mapping, you can add a second mapper of the type Hardcoded Group and then select the group(s) you automatically want to assign the user to.
The better alternative is an Advanced Claim to Group mapping. This mapping will only take place if the authenticated user’s claim contains a certain key-value combination. By using this functionality you can e.g., assign any user that is a member of the foo group in GitLab to the bar group in Keycloak.
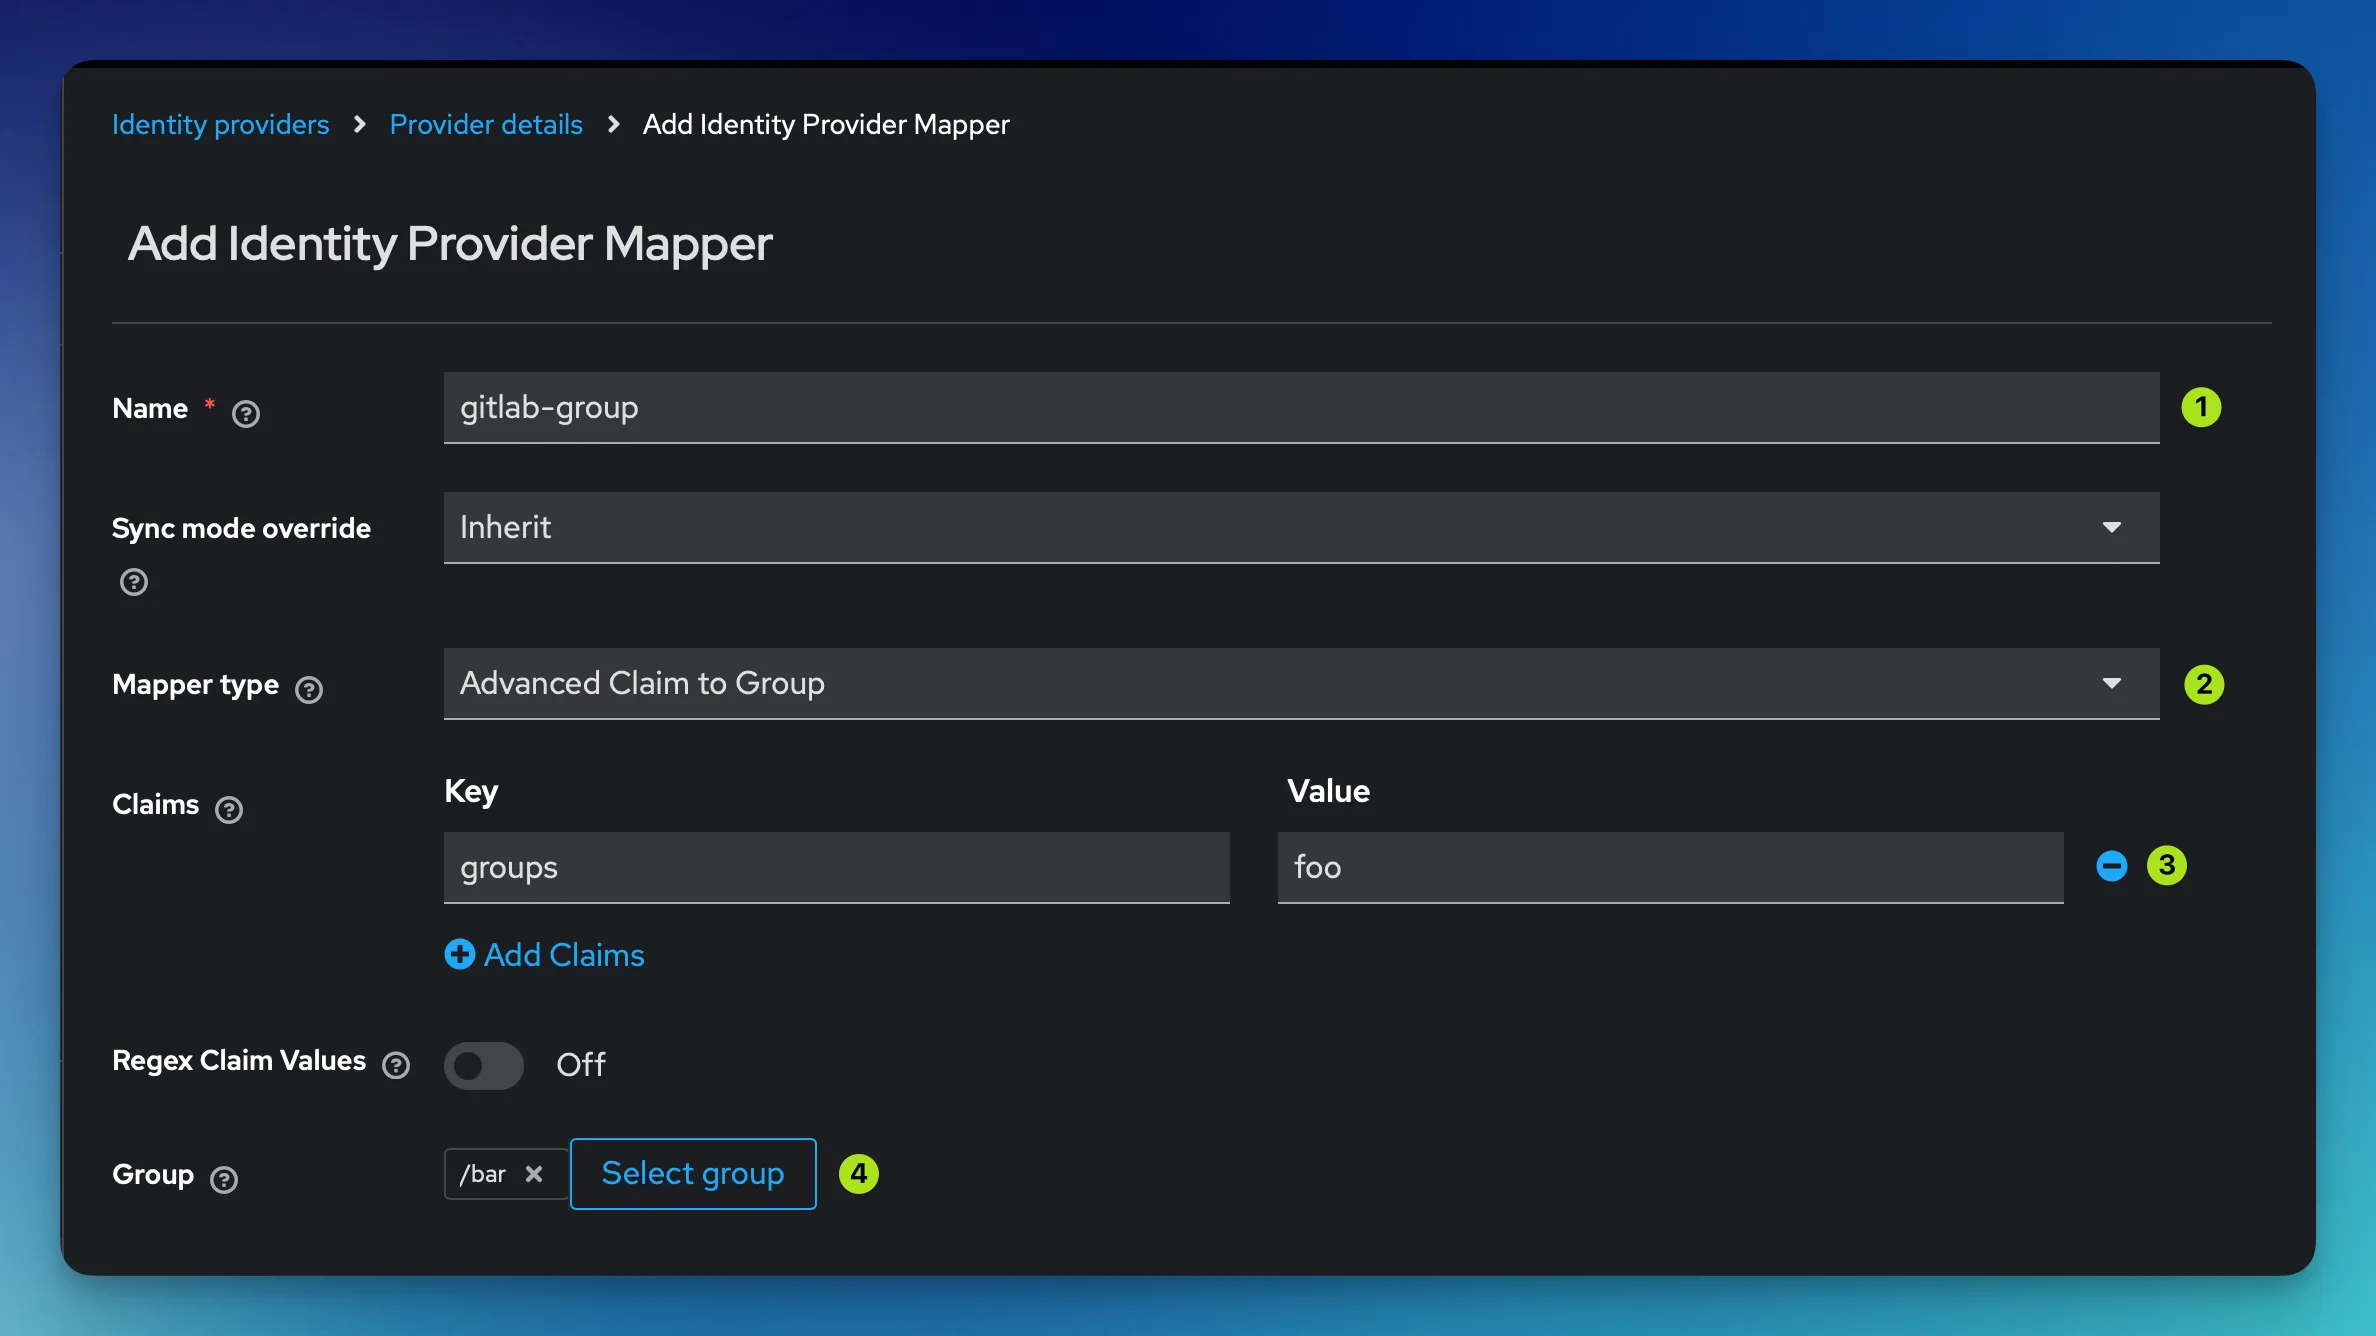
As you can see, the user gets automatically added to the bar group, if the groups claim from GitLab contains foo. By choosing this approach you get way more control over who’s authorized to do what after authenticating via the external GitLab OIDC service.
Static Username
When logging in for the first time, Keycloak shows a Username field by default. The username is pre-filled with the templated username we defined with the Username Template Importer mapper we configured above. However, the user could theoretically change that username. To prevent this from happening, there’s a quick and easy fix.
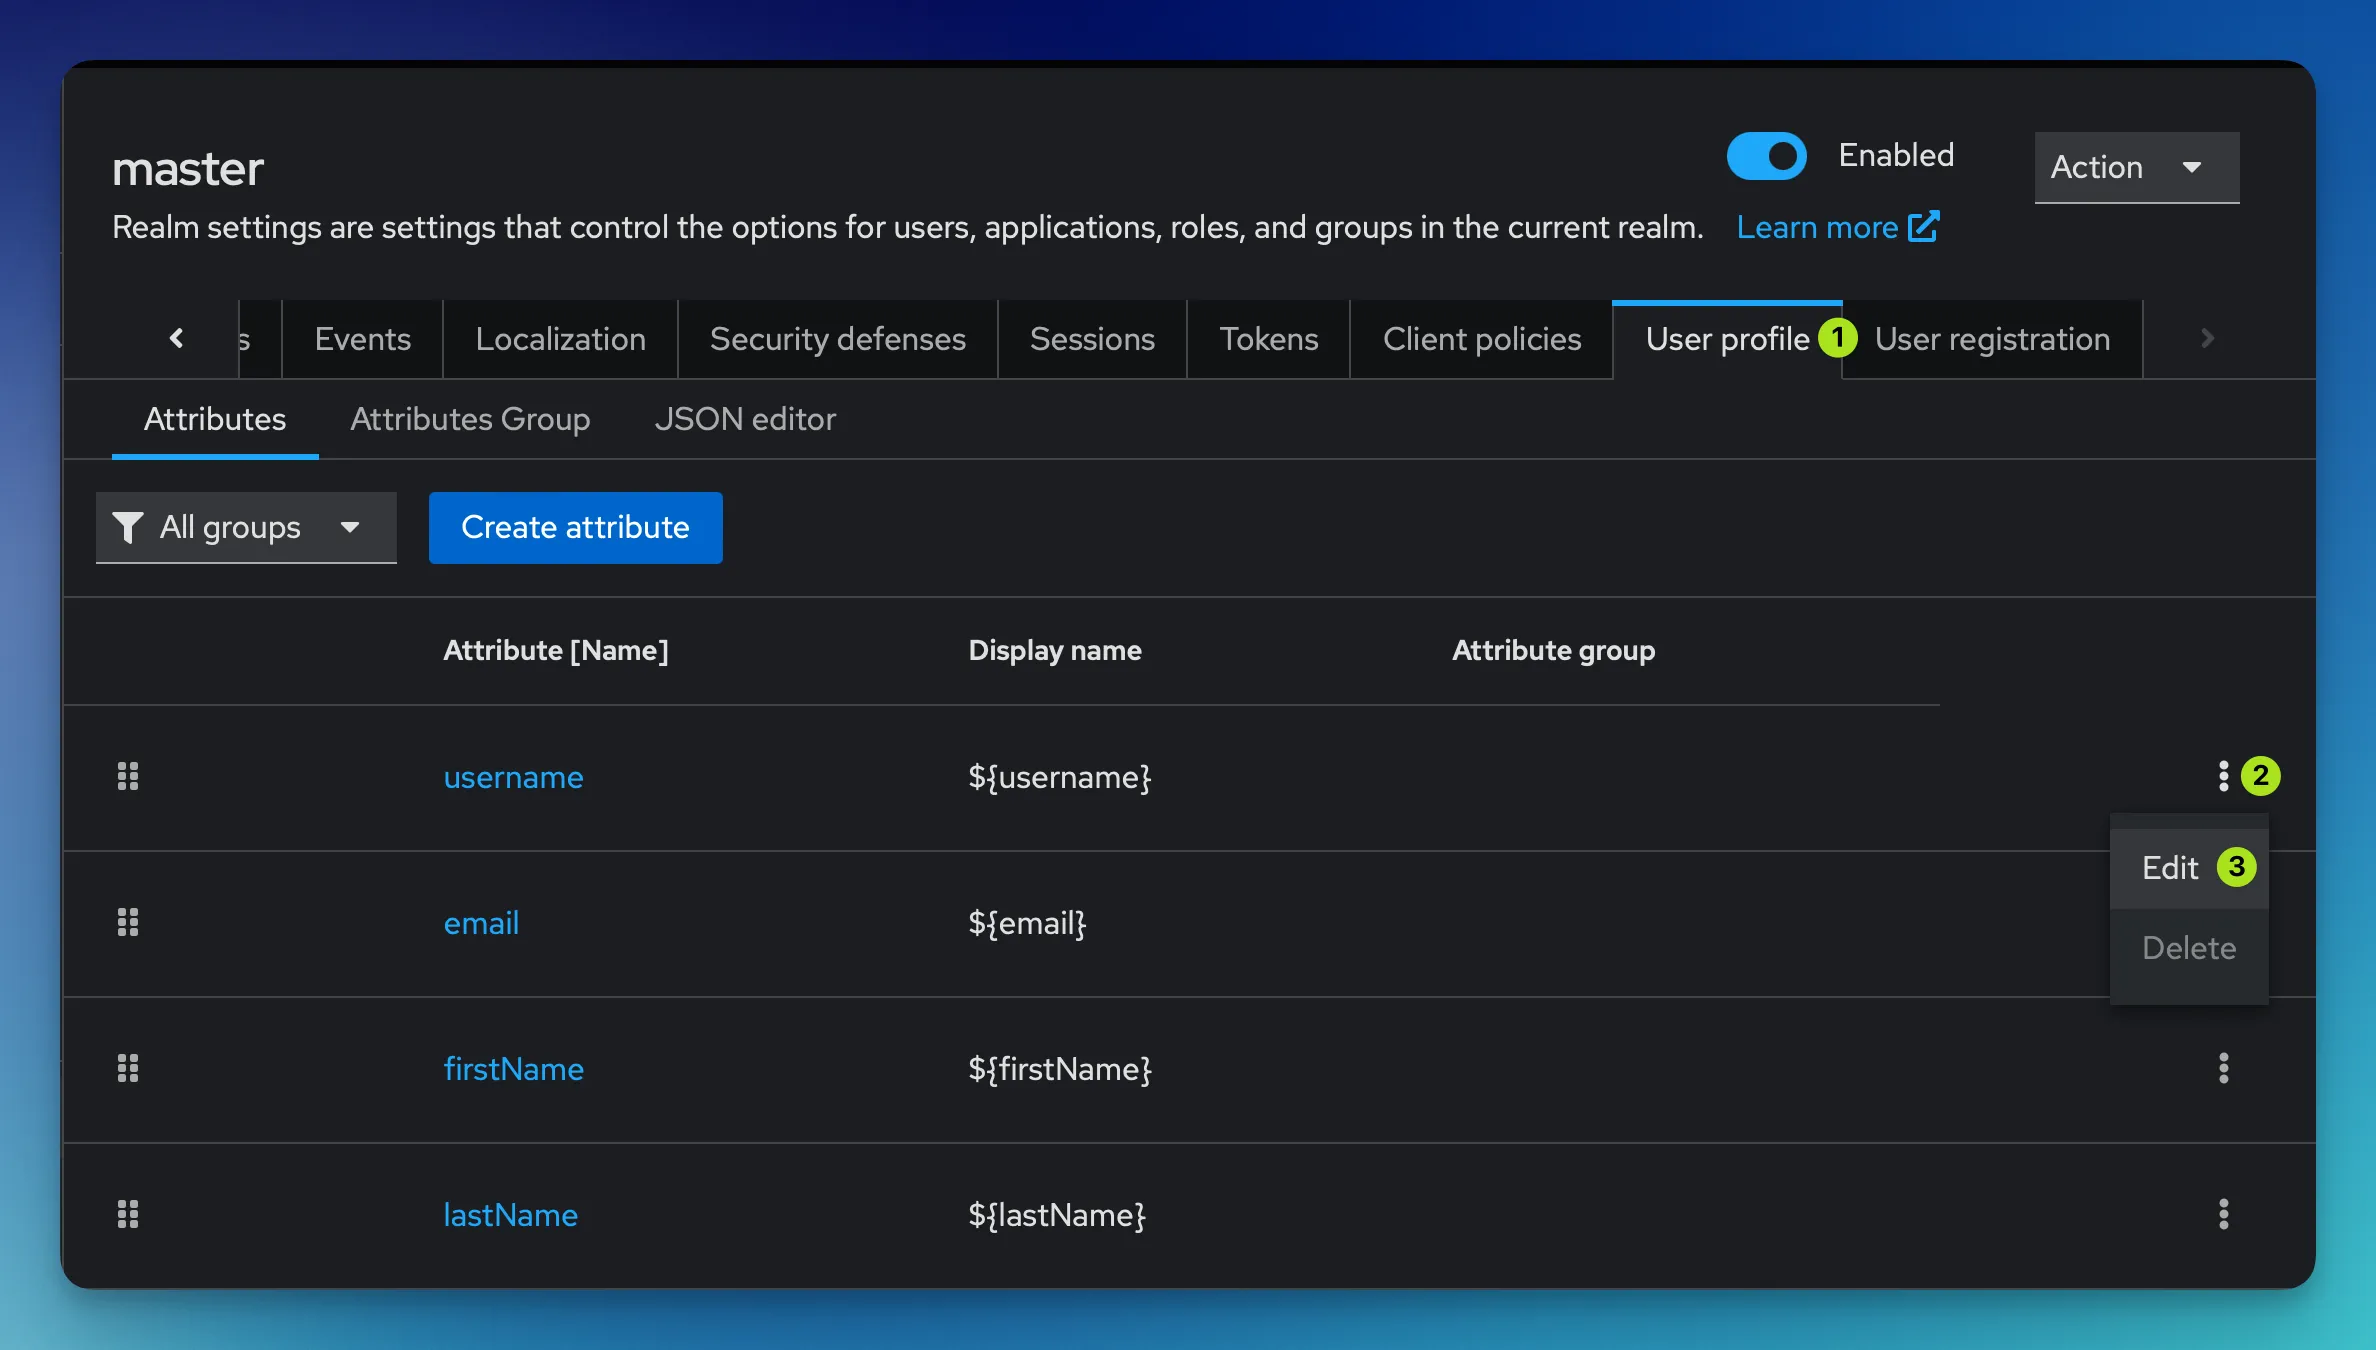
Under Realm settings in the lower left navigation, go to User profile and edit the username attribute.
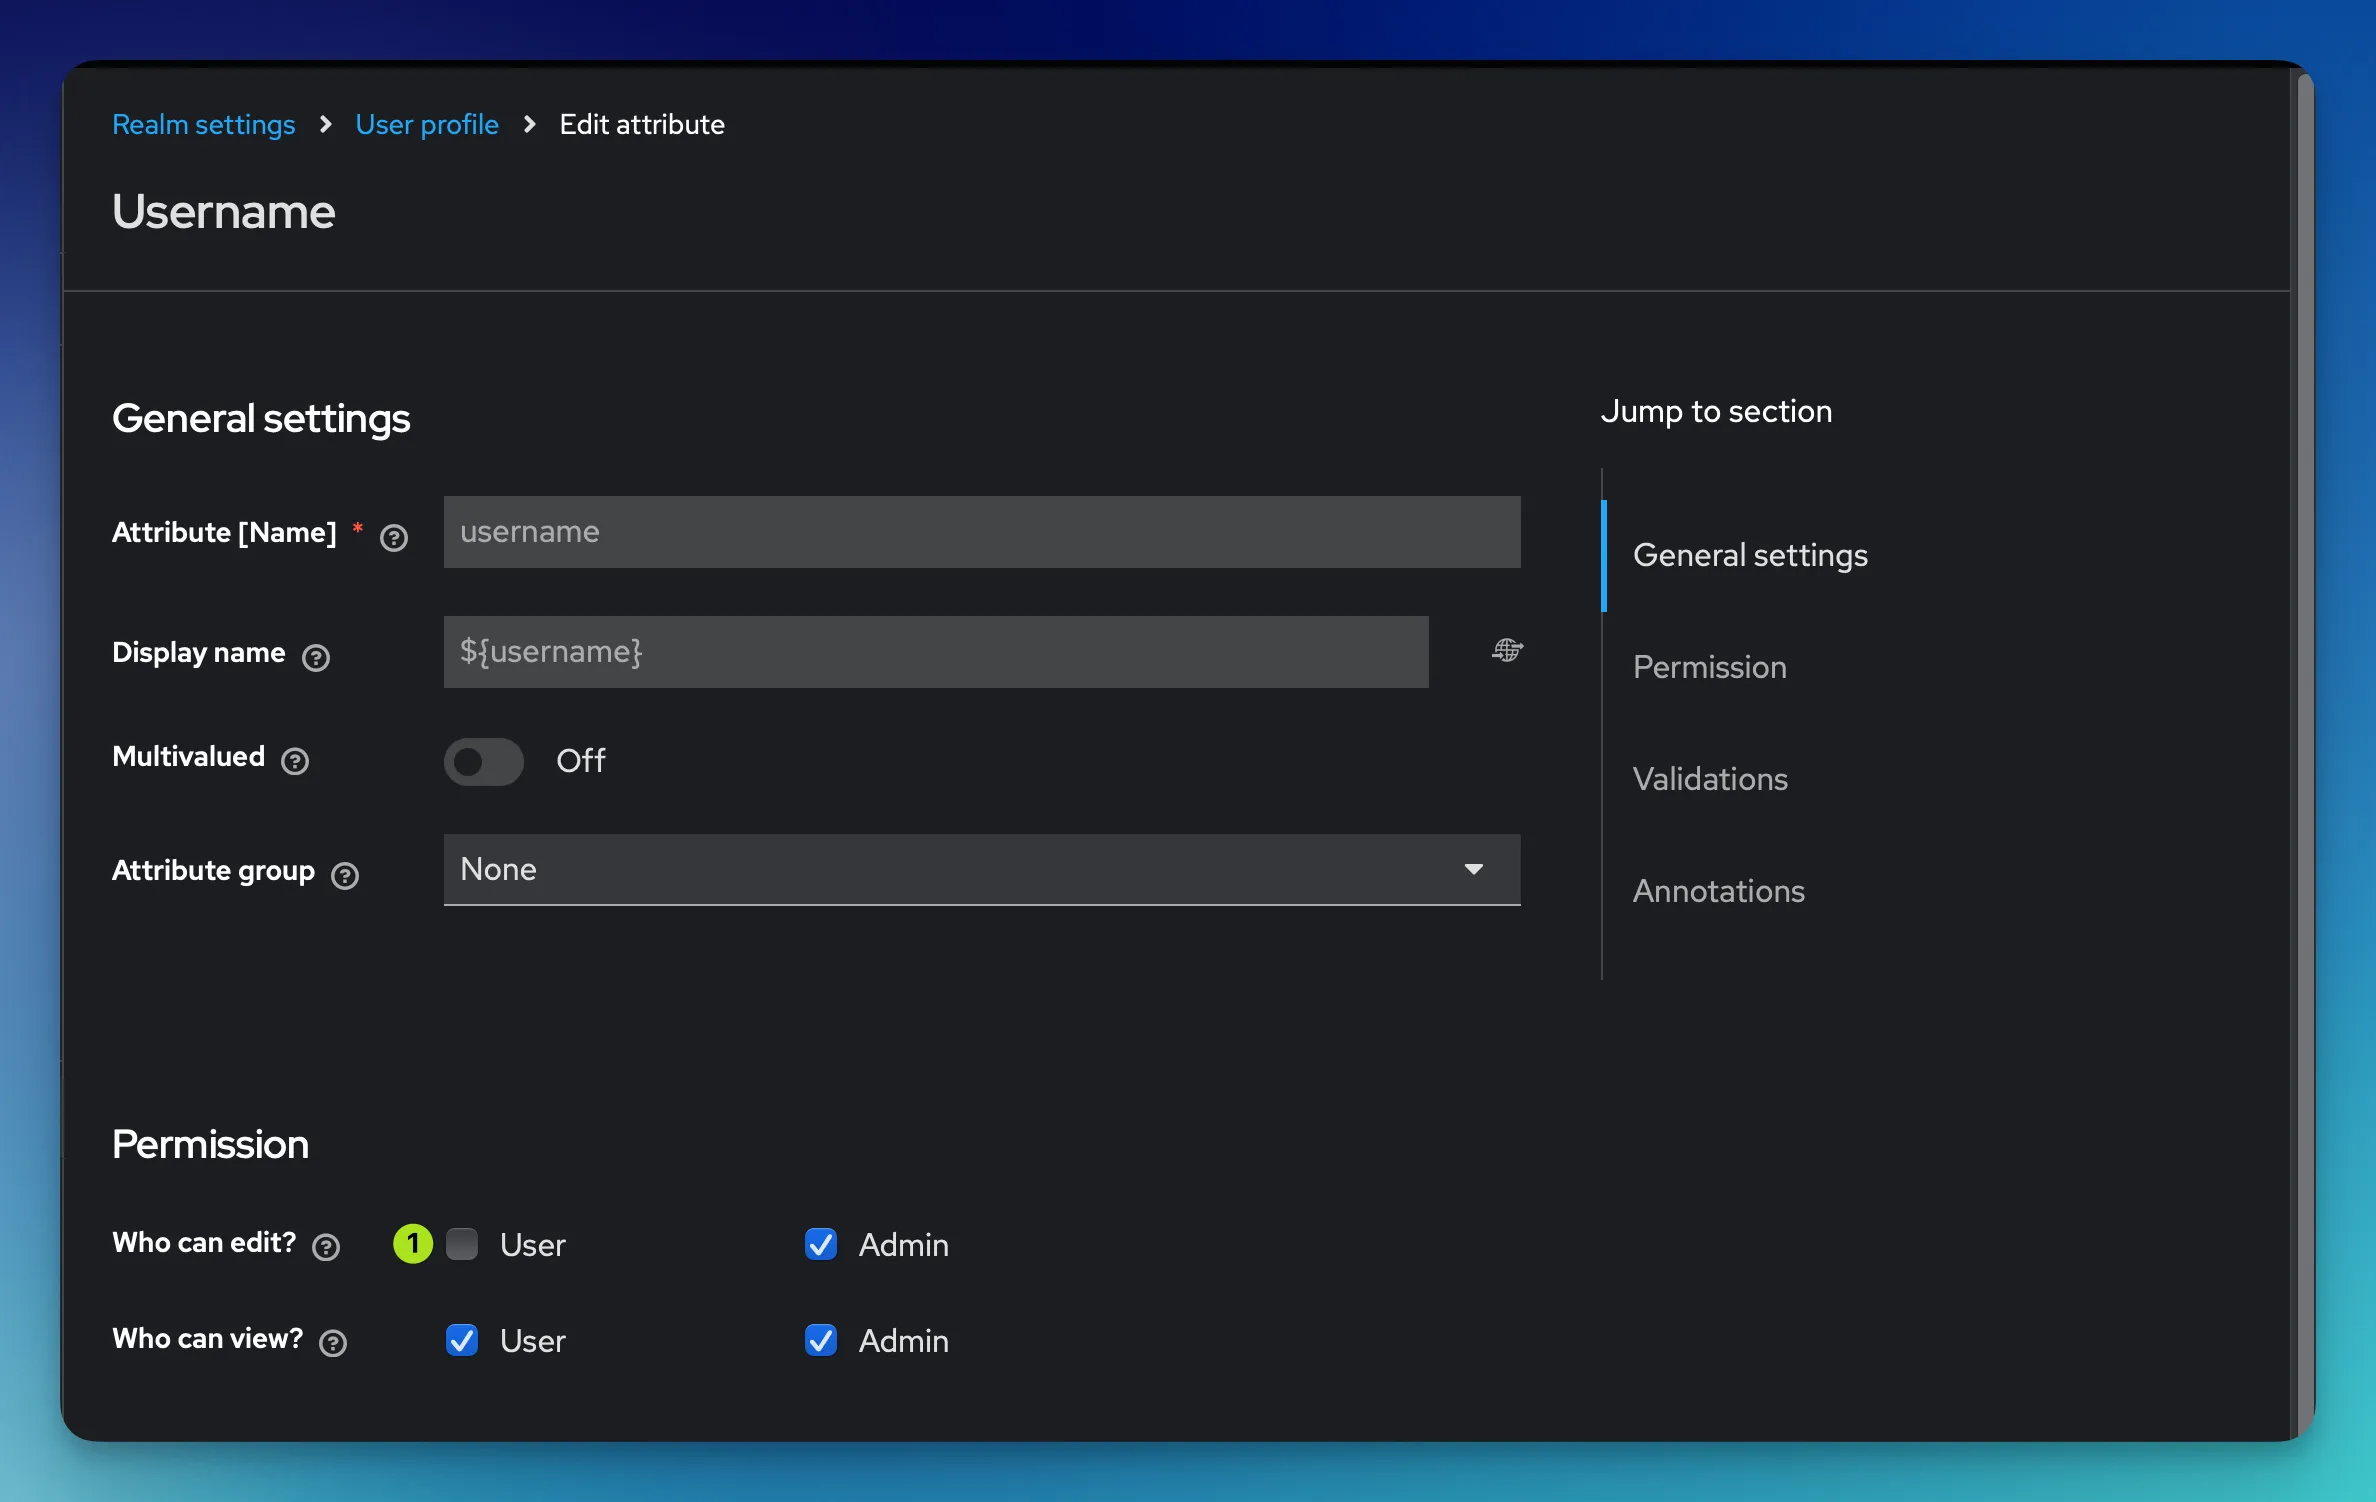
Then in the Permissions section, you can disable the user permission to edit their own username. As the field is no longer editable, it’s being automatically removed from the form the users see during their first login.